Bringing a newborn home is a beautiful, life-changing experience. Among the many things new parents learn, ensuring their baby’s health and safety is paramount. One crucial aspect of this is properly sterilizing baby feeding equipment. But with so many methods and opinions out there, “how to sterilize baby feeding equipment?” can feel like a daunting question.
This comprehensive guide will walk you through everything you need to know about sterilizing your baby’s bottles, teats, pacifiers, and other feeding gear. We’ll cover various sterilization methods, explain their pros and cons, and offer essential tips to keep your little one safe and healthy.
Why Sterilization Matters: Protecting Your Little One
Before we dive into the “how,” let’s understand the “why.” A newborn’s immune system is still developing, making them highly susceptible to infections. Bacteria and germs can easily grow on unsterilized feeding equipment, leading to various health issues like diarrhea, vomiting, and other gastrointestinal problems. Sterilization eliminates these harmful microorganisms, providing a clean and safe environment for your baby’s delicate digestive system.
Think of it as creating a protective shield for your baby’s gut. While good hygiene practices like washing hands thoroughly are always important, sterilization takes cleanliness to the next level, especially for items that come into direct contact with your baby’s mouth and food.
Essential Steps Before Sterilization: Cleanliness is Key
No matter which sterilization method you choose, proper cleaning is the first and most crucial step. Sterilization works best on already clean surfaces.
Here’s how to pre-clean your baby’s feeding equipment:
- Rinse Immediately: After each feeding, rinse bottles, teats, and other equipment under cold running water to remove any milk residue. This prevents milk from drying and becoming harder to clean.
- Disassemble Everything: Take apart all components of bottles, including teats, collars, and caps. For breast pump parts, disassemble according to the manufacturer’s instructions.
- Wash Thoroughly:
- By Hand: Use a clean bottle brush and warm soapy water to scrub all parts. Pay special attention to hard-to-reach areas like the inside of teats and bottle nipples. Ensure you use a dedicated brush for baby feeding equipment and replace it regularly.
- Dishwasher: Many bottles and feeding accessories are dishwasher safe. Place them on the top rack, away from heavily soiled items, and use a hot wash cycle with a heated drying option (if available). Always check the manufacturer’s instructions for dishwasher compatibility.
- Rinse Again: After washing, rinse all items thoroughly under clean running water to remove any soap residue.
Once cleaned, your equipment is ready for sterilization.
Popular Sterilization Methods: Choosing What’s Right for You
There are several effective ways to sterilize baby feeding equipment. Each method has its advantages and disadvantages, so choose the one that best fits your lifestyle and preferences.
1. Boiling: The Traditional and Accessible Method
Boiling is one of the oldest and most straightforward methods of sterilization. It’s highly effective and requires no special equipment beyond a pot and stove.
How to Do It:
- Place all clean feeding equipment into a large pot.
- Ensure all items are fully submerged in water.
- Bring the water to a rolling boil.
- Boil for at least 5 minutes. Some recommend up to 10 minutes for extra caution.
- Carefully remove the items using clean tongs. Be cautious as they will be very hot.
- Place the sterilized items on a clean, dry surface or a dedicated drying rack to air dry. Avoid using a tea towel as it can reintroduce germs.
Pros:
- Cost-effective: Requires no special equipment.
- Highly effective: Kills most bacteria and viruses.
- Accessible: Can be done anywhere with a stove and pot.
Cons:
- Risk of damage: High heat can potentially warp or degrade some plastic bottles over time.
- Time-consuming: Requires active monitoring.
- Heat hazards: Handling hot items requires caution.
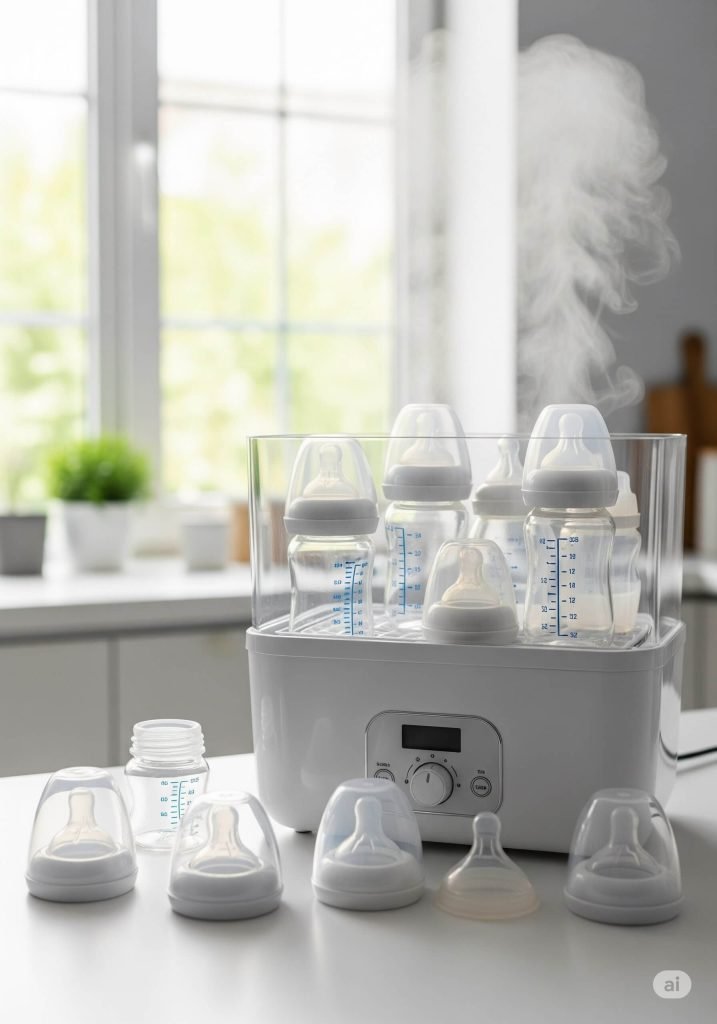
2. Steam Sterilizers: Convenient and Efficient
Electric steam sterilizers are popular choices for busy parents. They use high-temperature steam to kill germs quickly and efficiently.
How to Do It:
- Place cleaned feeding equipment into the sterilizer, following the manufacturer’s instructions for arrangement.
- Add the recommended amount of water to the base of the sterilizer.
- Turn on the sterilizer and let it complete its cycle. Most cycles take between 6 and 12 minutes.
- Some models have a “keep sterile” function, which keeps items sterile for several hours if the lid remains unopened.
Pros:
- Fast and efficient: Sterilizes multiple items quickly.
- User-friendly: Simple to operate with automated cycles.
- Safe for plastics: Less likely to damage plastic bottles compared to prolonged boiling.
- No chemicals: Uses only water.
Cons:
- Initial cost: Requires an upfront investment in the appliance.
- Requires counter space: Can be bulky.
- Descaling needed: Regular cleaning and descaling are necessary to prevent mineral buildup.
3. Microwave Steam Sterilizers: Compact and Quick
Microwave steam sterilizers offer a similar convenience to electric steam sterilizers but are more compact and ideal for smaller spaces or travel.
How to Do It:
- Place cleaned feeding equipment into the microwave sterilizer, ensuring they are arranged as per instructions.
- Add the specified amount of water to the base.
- Place the sterilizer in the microwave and run it for the recommended time (usually 3-8 minutes, depending on your microwave’s wattage).
- Allow the unit to cool before carefully opening.
Pros:
- Fast: Sterilizes very quickly.
- Compact: Takes up less space than electric sterilizers.
- Portable: Easy to take when traveling.
Cons:
- Requires a microwave: Not suitable if you don’t have one.
- Heat hazards: Items can be extremely hot after the cycle.
- Limited capacity: Typically sterilizes fewer items at once.
4. Cold Water Sterilization (Sterilizing Solution): Chemical-Based Option
Cold water sterilization involves using special sterilizing tablets or liquids that dissolve in water to create a germ-killing solution.
How to Do It:
- Prepare the sterilizing solution in a clean, non-metallic container according to the product instructions.
- Submerge all cleaned feeding equipment completely, ensuring no air bubbles are trapped inside.
- Leave the items in the solution for the recommended time (usually 30 minutes).
- When ready to use, remove the items, shake off excess solution, and they are ready. Rinsing is generally not required unless specified by the product.
Pros:
- No heat involved: Ideal for delicate items and reduces the risk of burns.
- Convenient: No electricity or heat source needed.
- Portable: Great for travel or camping.
Cons:
- Chemicals involved: Some parents prefer to avoid chemicals if possible, though solutions are designed to be safe.
- Smell/taste: Some solutions may leave a faint smell or taste on equipment, though this is usually harmless and dissipates quickly.
- Requires fresh solution: The solution needs to be replaced every 24 hours.
Important Tips for Safe Sterilization and Storage
- Wash Your Hands: Always wash your hands thoroughly with soap and water before handling sterilized equipment.
- Use Clean Tongs: Use clean tongs or a dedicated sterilizer tong to remove items from sterilizers or boiling water.
- Air Dry: Allow sterilized items to air dry on a clean, dedicated drying rack. Avoid using towels, which can harbor germs.
- Store Safely: Once dry, assemble bottles and store them in a clean, dry, and covered container or cupboard until needed. If using a sterilizer with a “keep sterile” function, leave items inside until you’re ready to use them.
- Sterilize Daily (or as Needed): For newborns and babies up to 6 months, daily sterilization of all feeding equipment is generally recommended. After 6 months, as your baby’s immune system matures, thorough cleaning may be sufficient, but always consult with your pediatrician.
- Check for Wear and Tear: Regularly inspect bottles, teats, and pacifiers for any signs of damage, cracks, or discoloration. Replace worn-out items immediately.
- Follow Manufacturer’s Instructions: Always refer to the specific instructions provided by the manufacturer of your baby feeding equipment and sterilization device.
When Can You Stop Sterilizing?
The recommendation for how long to sterilize baby feeding equipment can vary slightly, but generally, it’s advised to continue until your baby is around 6 months old. By this age, their immune system is more developed, and they are typically putting more objects into their mouths anyway as part of exploration.
However, even after 6 months, it’s crucial to maintain excellent hygiene: thoroughly wash all feeding equipment after each use, especially if your baby has been unwell. If you have any concerns or your baby has specific health conditions, always consult your pediatrician for personalized advice.
Conclusion: Peace of Mind for You and Your Baby
Sterilizing baby feeding equipment might seem like an extra step in an already busy schedule, but it’s a vital practice that protects your newborn from harmful germs and illnesses. By understanding the different methods and following proper hygiene guidelines, you can ensure your baby’s feeding experience is as safe and healthy as possible. Choose the method that suits you best, stay consistent, and enjoy the precious moments with your little one, knowing you’ve provided them with the best possible start.
FAQ: How to Sterilize Baby Feeding Equipment?
1. How often should I sterilize baby bottles? For newborns and babies up to 6 months old, it’s generally recommended to sterilize all feeding equipment daily after each use. After 6 months, thorough cleaning might suffice, but always consult your pediatrician.
2. Is boiling bottles safe for all types of plastic? While boiling is effective, prolonged boiling can potentially warp or degrade some plastic bottles over time. Always check the manufacturer’s guidelines for your specific bottles.
3. Do I need to sterilize breast pump parts? Yes, it’s crucial to sterilize breast pump parts that come into contact with breast milk, especially for newborns and young infants. Follow the manufacturer’s instructions for your pump.
4. Can I use the dishwasher to sterilize baby bottles? No, a dishwasher typically cleans but does not sterilize. While a hot wash cycle with a heated drying option can help, it’s not a substitute for proper sterilization methods like boiling or using a steam sterilizer.
5. How long do sterilized bottles stay sterile? If left assembled and covered in a clean, dry place (or within a sterilizer with a “keep sterile” function), items can remain sterile for up to 24 hours. Once opened or removed, they should be used or re-sterilized if not used within a few hours.
6. Is cold water sterilization as effective as boiling? Yes, cold water sterilization using a proper sterilizing solution is highly effective at killing bacteria and viruses, similar to boiling, but without the need for heat.